












📑 Table of Contents
Introduction
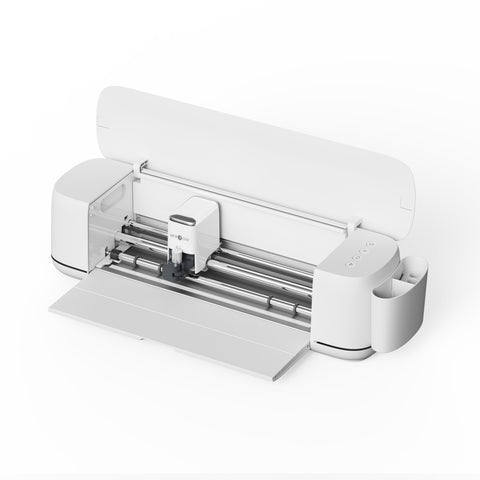
In this lesson, we'll show you how to use the foil transfer function on the HTVRONT C2 Vinyl Cutter to add metallic details to card, sometimes referred to as cardstock. The foil transfer tool presses a compatible foil sheet against the card along the lines of your design, leaving a shiny finish that a cutting blade alone cannot produce. It's ideal for adding a decorative touch to personalised greetings cards, invitations and gift tags.

This lesson covers a foil-only task, so you won't need to swap tools part-way through. Simply fit the foil transfer tip, place the card and foil on the cutting mat, choose the settings in IdeaStudio and start the task.
If you've just unpacked your machine, start with the C2 unboxing and setup guide. For help connecting the machine, loading a mat and preparing your first design, read how to use the C2 Vinyl Cutter for the first time before working through this lesson.
Here's what we'll cover:
- Fit the foil transfer tip
- Prepare and load the material
- Create your design
- Choose the foil settings
- Start foiling and reveal your design
Step 1: Fit the Foil Transfer Tip
The foil transfer tool comes with three tip sizes: Bold, Medium and Fine.

Choose the tip that best suits your design. Insert it into the foil transfer housing and make sure it is fully seated. For this project, we're using the Bold tip.

Open the tool clamp.

Place the foil transfer housing in the tool holder.

Close the clamp securely.

📌 Match the tip to the software setting. Make a note of which tip you've fitted — Bold, Medium or Fine. In Step 4, you'll need to select the same size in IdeaStudio so that the task settings match the tool you're using.
Step 2: Prepare and Load the Material
Place the card on a light-grip cutting mat and press it down firmly. Lay the foil transfer sheet over the card with the coloured side facing upwards. Smooth out the foil and secure the edges with masking tape.

Make sure the foil lies flat and that the tape does not cover any part of the design. The foil sheet should be large enough to cover the whole design area.
Press the Power button to switch on the machine. Align the mat with the machine's guides, then press Load to feed it into the machine.
Choose a compatible foil sheet. This process uses pressure from the foil transfer tip rather than heat. Use a foil transfer sheet that is suitable for the C2 tool; heat-activated craft foil is not necessarily interchangeable.
Step 3: Create Your Design
Open HTVRONT IdeaStudio and connect your C2 Cutting Machine.

On the canvas, select Upload to add your own design.

Alternatively, choose a design from the Library.

Adjust the size and position of your design so that it fits on the card and sits entirely within the area covered by the foil. Then click Make to open the task settings page.
Step 4: Choose the Foil Settings
Select the colour group you'd like to foil.

Under Operation, you'll see options including Cut, Score, Foil and Draw. Select Foil for this task.

Choose the Size that matches the tip you've fitted. As we're using the Bold tip, select Bold in the software.
For the foil sheet and kraft card used in this demonstration, select Foil sheet + Kraft Cardstock Paper. This is the material name shown in IdeaStudio.

The Making Force setting will adjust automatically according to the material preset you've selected.

Check the operation, tip size and material selection, then click Add to Task to open the Task List.
Using a different type of card? Choose the closest supported material setting and try a small design on an offcut first. The card's texture and thickness can affect how evenly the foil transfers.
Step 5: Start Foiling and Reveal Your Design
Click Start to begin.

The machine will follow the lines of your design and transfer the foil onto the card.

Leave the mat, card and foil in place until the task has finished completely.
Once foiling is complete, unload the mat from the machine.

Carefully remove the masking tape and peel away the foil transfer sheet to reveal your design.

Your foiled design is now complete. Check that the lines have transferred evenly before removing the card from the mat.
Video Tutorial
Watch the full foil transfer process in the 2-minute 42-second tutorial below.
Conclusion
Foil transfer is a simple way to add metallic detail to paper projects without cutting through the material. For this foil-only task, fit the correct tip, secure the foil flat over the card and choose the matching settings in IdeaStudio. Allow the machine to finish before peeling away the foil sheet.
For a folded greetings card, pair your foiled design with the techniques in Vinyl Cutter Lesson 2: Scoring Setup & Folding Workflow. Plan the order of the tasks and any tool changes before you begin, and keep the project aligned between stages.
If your next project calls for a different material, switch back to the appropriate cutting blade and settings. Adhesive vinyl is a practical choice for decals on suitable hard surfaces, while heat transfer vinyl is used to decorate suitable fabrics. After cutting and weeding HTV, use a heat press to apply it. This is a separate process from the pressure-based foil transfer shown in this lesson.
If you're new to fabric decoration, read what heat transfer vinyl is and how it works. Before pressing, consult the UK heat press settings guide alongside the instructions for your chosen transfer material and garment.
Frequently Asked Questions
Here are a few common questions about trying foil transfer for the first time.
Which foil tip size should I start with?
Bold is a good starting point for a simple design with clearly visible lines. Medium and Fine are better suited to narrower lines and more detailed artwork. Choose the tip according to the finish you'd like, then try it on an offcut of the same card before making your final piece.
Why does the software ask for the foil tip size?
The tip size tells IdeaStudio which foil tool configuration you're using. Select Bold, Medium or Fine to match the tip fitted in the housing. This ensures that the task settings correspond to the tool in the machine.
Can I reuse the foil sheet?
You can sometimes reuse an untouched section of the sheet. Areas from which the foil has already transferred cannot be used again. After peeling, check for an unmarked section large enough to cover your next design, and avoid placing creased or damaged areas over the design lines.
Why is my foil transfer patchy or incomplete?
Check that the foil is flat and securely taped, the card is clean and firmly attached to the mat, and the tip is fully seated. Make sure the tip size selected in IdeaStudio matches the fitted tip and that the material preset is suitable. Textured card or incompatible foil can also affect coverage, so try a small test on an offcut first.
Can I use foil transfer on materials other than card?
This lesson covers paper and card. Before trying another surface, check that it is compatible with the foil sheet, tool and machine settings. Do not assume that the card preset will work on vinyl or fabric. For a standard fabric design, cut and weed suitable HTV, then apply it with a heat press according to the material's instructions.
Do I need a heat press for this project?
No. This project uses pressure from the C2 foil transfer tool and a compatible foil sheet. A heat press is used for separate processes, such as applying HTV to fabric or transferring sublimation prints onto suitable blanks.
Keep Learning
Explore more C2 setup and material tutorials, or take a look at the UK heat press guides for separate fabric and sublimation projects.
Vinyl Cutter Tutorials
- C2 Vinyl Cutter Unboxing: What's in the Box & Setup Check the box contents and get your machine ready for its first project.
- How to Use the C2 Vinyl Cutter for the First Time Work through the basic setup and first-use steps.
- Vinyl Cutter Lesson 1: Deep Cutting Faux Leather on C2 Learn how to prepare and cut faux leather with the deep-cutting tool.
- Vinyl Cutter Lesson 2: Scoring Setup & Folding Workflow Create fold lines for greetings cards and other paper projects.
HTV Basics & Heat Press Settings
- What Is Heat Transfer Vinyl? Get to know HTV before moving from paper projects to fabric decoration.
- Heat Press Settings for HTV, DTF & Sublimation (UK Guide) Find guidance on temperature, time and pressure for different transfer methods.
Heat Press Tutorials
- H10 T-Shirt Press Tutorial: Settings, Steps & Tips Follow the H10 pressing process for flat garment projects.
- How to Use the A300 Auto Hat Heat Press: Step-by-Step Learn how to set up the A300 and press suitable hats.
- How to Sublimate Phone Cases on the H17 Heat Press Explore the sublimation process for compatible phone cases.
- A200 Tumbler Heat Press Guide: Handle Tumbler Workflow Follow the A200 tutorial for suitable tumblers with handles.
- A100 Auto Multi Heat Press Guide: Flat Plate Workflow Use the A100 flat plate for suitable flat transfer projects.
- A100 Multi Heat Press Guide: Hat Plate Workflow Work through the hat plate setup and pressing steps.
- A100 Multi Heat Press Guide: Tumbler Plate Workflow Learn how to use the A100 tumbler plate with compatible blanks.

Leave a comment
All comments are moderated before being published.
This site is protected by hCaptcha and the hCaptcha Privacy Policy and Terms of Service apply.