Recommended products

SECURED PAYMENT

FREE SHIPPING OVER £39
Delivery in 3–10 business days (Pre-order items excluded)

MONEY-BACK GUARANTEE
30-Day Return Guarantee


Delivery in 3–10 business days (Pre-order items excluded)

30-Day Return Guarantee

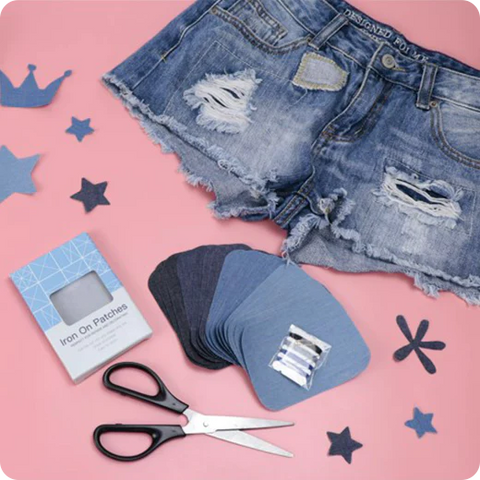
Imagination always being limited when it comes to working with iron on patches. Most of the time, my mind just got stuck fixing my threadbare clothes with them. However, after I watched and tried a lot of trendy tutorial videos, I finally came out with this step-by-step guide to iron on patches!
Let’s see together what you can make out of your patches!

I believe that “patch” is a familiar word for most of us from childhood. However, what this iron-on patch is will be a curious question for beginners. As the word says, it’s a fabric patch that can be ironed on other garments.
Unlike traditional patches always sewn through threads, this new style patch is designed by a computer and an advanced embroidery machine. It features a thin layer of plastic covered with strong adhesion. This adhesion coating will be activated and melted by heat and then embedded into the garment you want to decorate.
Since this patch needs a high temperature to work perfectly, we always use a home iron or a heat press to iron it on the fabrics. Compared to traditional sewing, this iron-on technique performs more efficiently and effortlessly.

Usually, you can buy these iron-on patches on online shopping platforms like Walmart and Amazon easily. These online stores sell many pre-designed patches of various themes, such as adorable emojis, delicious foods, popular cartoon characters, cute animals, and so on. Also, you can take advantage of the custom-order service of some stores to customize your favorite images on patches.
Of course, if you prefer to do some handiwork by yourself and enjoy the embroidering process, it’s also quite easy to accomplish your idea.
Before making your own iron-on patches, you may need these items in advance:
1. An artwork or a picture with clear lines.
2. A piece of flexible and white cloth.
3. An embroidery hoop that helps fix and straighten your piece of cloth.
4. A pen.
5. Some colorful embroidery threads.
6. Fabric glue.
7. Parchment paper or Teflon sheet.
8. A home iron or a heat press machine.
First, you can just draw artwork on paper or print some favorite images with a printer. Combine the artwork or the picture with the cloth together and fix them with the embroidery hoop. Once you use the hoop to fasten these two items, they will easily be straightened for tracing the lines.
Now, use a pen to trace down the lines of the image on your cloth. After finishing the sketch, it’s time for you to fill the lines with colorful threads. I would recommend you sew the threads with one color after another, which can be efficient and time-saving.
Be careful not to poke your fingers during the embroidering process, and remember to get rid of the extra dangling thread on the back of the cloth. Make the final stitch and cut the whole embroidered image out of the cloth.
Last, put some fabric glue on the back side of the embroidered cloth. Done! Your custom iron-on patch has finished! Quite easy, isn’t it?
Of course, if you prefer to sew this patch on your garment, or you’re going to repair the wear and tear on your favorite clothes, then it’s better to save the last move.
The fabric glue can help you put the patches on your garment quickly and effortlessly, and the adhesion is strong that it can hold on well in a dry environment. But if the garment needs to be worn frequently or in a wet environment, you may handle the patch, preferably, with a sewing technique.
After making yourself such a lovely iron-on patch, Preheat your home iron or heat press. Technically, the proper applying temperature is 270℉, so you need to set your home iron at “cotton” mode or the exact temperature on your heat press. When the machine reaches its setting temp, iron the garment you’re going to decorate first to remove the wrinkles, which can boost the further ironing effect.
Then, position your iron-on patch on the exact place on your garment and put parchment paper or a Teflon sheet on the patch. Press your heating machine on the paper. If you’re using a home iron, you may need to iron the patch for like 30 seconds, and if you work with a heat press, 12 to 15 seconds can be enough.
Personally speaking, a heat press would be better than a home iron, which usually has well-controlled, even, and fast heat. Most heat presses feature a digital screen showing the temp and time intuitively so that you can keep tabs on the final results.

When you finish the ironing process, eventually, there must be a glow of joy filling in your heart! Now it’s your turn to let your mind go wild with patches for clothes!
To improve our service quality, we value your shopping experience at HTVRONT official website and your willingness to recommend us to others. Please take a few moments to complete this survey.Your opinions are important to us. Thank you for your participation and support!
Website interaction (e.g., shopping page, promotion, order, payment process)
Product (e.g., product quality, style)
Logistics (e.g., shipping, delivery)
Customer Service (e.g., response speed, professionalism)
[Website - Shopping Page]
[Website - Promotion]
[Website - Order and Payment Process]
[Product]
[Logistics]
[Customer Service]